User manual
Hair Concept 3D
Copyright 2015-2016, Style Concept SC KG
Installation tutorial
For installation, a functional internet connection is neccessary.
- Step 1 - Prepare the tablet
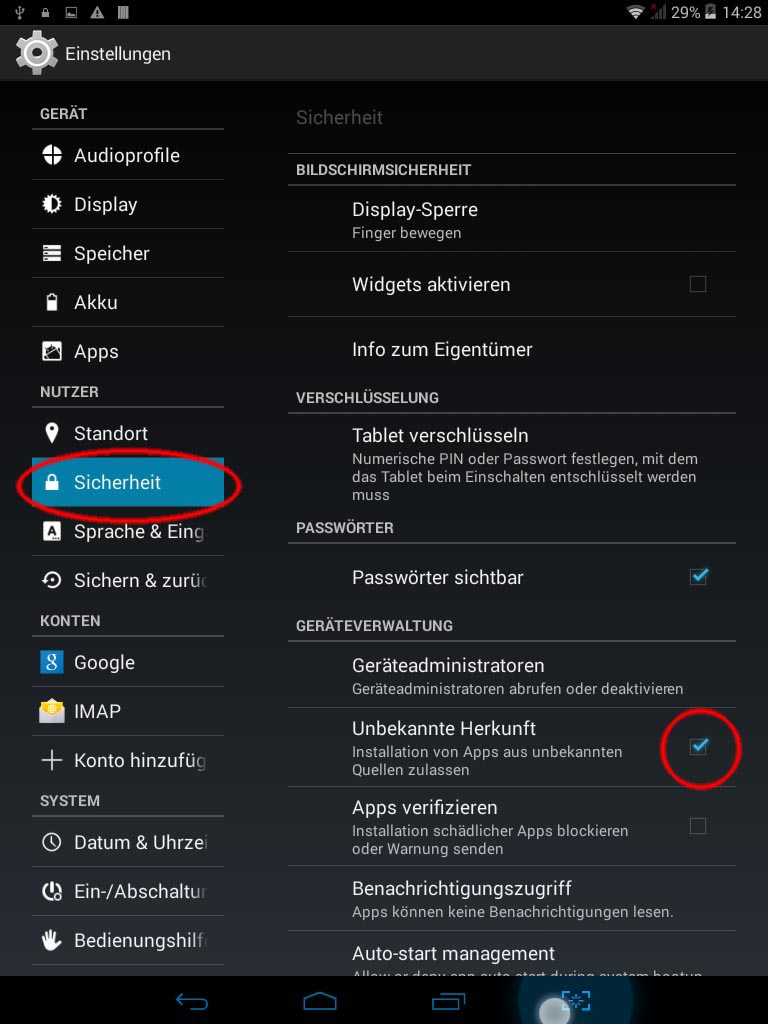
- Open the settings dialog
- Item Security
- Check the item Unknown sources (must be enabled)
- Optional - Goto Display and increase time until the display is switched off.
- Step 2 - Download
- Open Chome or Browser-App
- Enter the following URL www.style-concept.com/download .
- Enter your registration key (can be found on the license sheet)
- Download begins, wait until done.
- Open Downloads-App, click on hairconcept3d.apk - be careful with the file names
- Confirm installation dialogs
- Step 3 - register
- Open Hair Concept
- Enter your license key one more time
- Confirm, done.
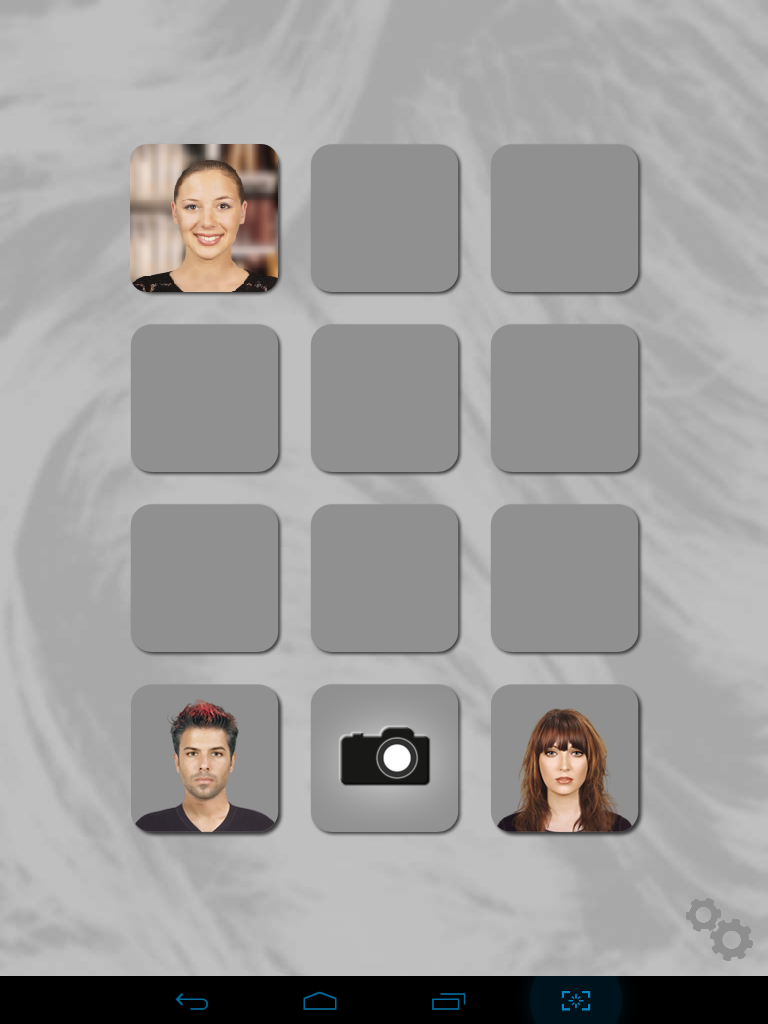
Overview
-
Free project.
-

Starts image capture. For some tablets, the original camera app produces sharper images than the integrated capture screen of Hair Concept. If this is also the case for your tablet, you can choose the original camera app fromthe chooser dialog.
-

Occupied project. To delete a project, keep it pressed for a few seconds and confirm the deletion.
-

Open Style Atlas with male haircuts
-
Open Style Atlas with female hairstles
Image capture
-

Snaps the picture
-

Back
-

Shows the image capture tutorial
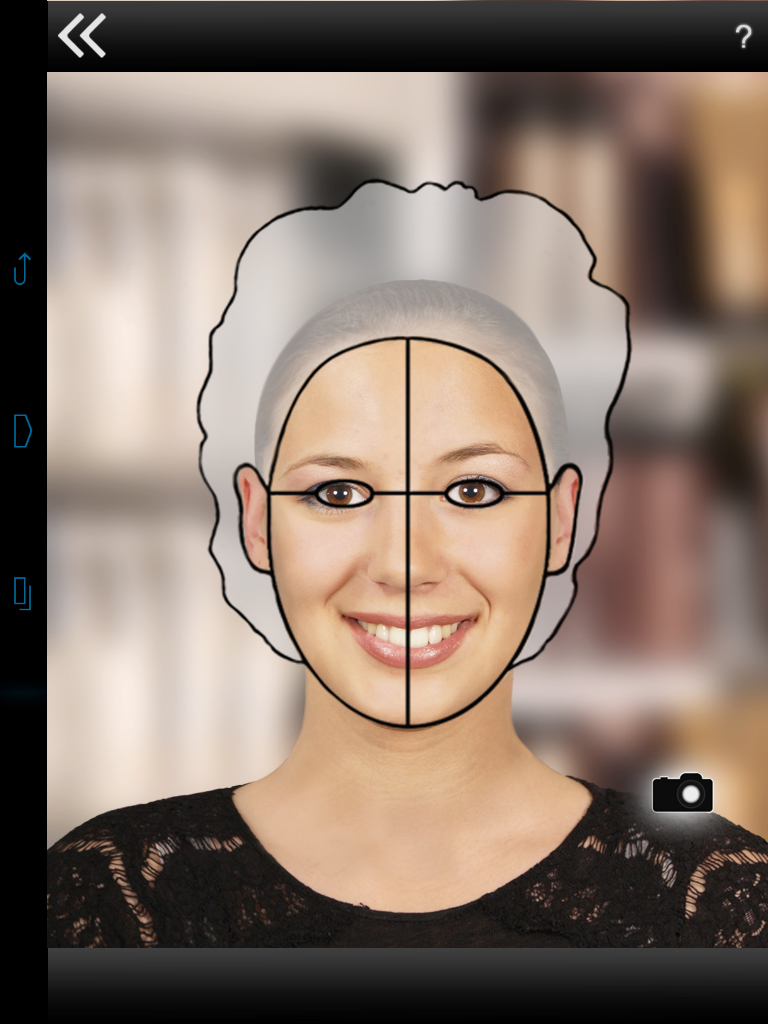
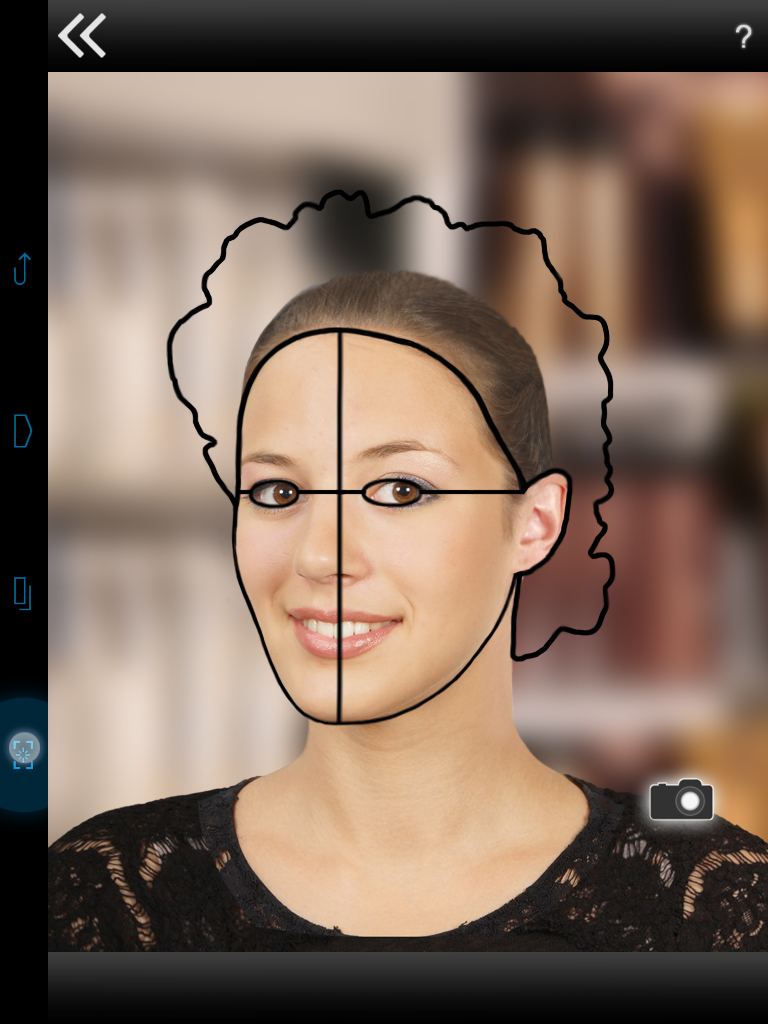
Image capture guide
Please obey the following basic rules for the image captures
- Image quality is crucial
- Without a good picture, the following simulation cannot be convincing
- Customer face should fit into projected face line
- Try to see the face roughly fitting to the face line when the image is snapped.
- Camera lens at height of the eyes
- Take care not to take the picture from below or above the customers head.
- Smile
- It is important that your customer like the image that you have taken of him. Also a likable facial expression is necessary.
- Good lighting situation
- Take care to perform the image capture in a well-lit room. Ofte, taking the picture in direction of the day light in front of a window helps (not in a back-lit situation!).
- New capture
- In case anything is not perfect with the captured image, just take a new one.
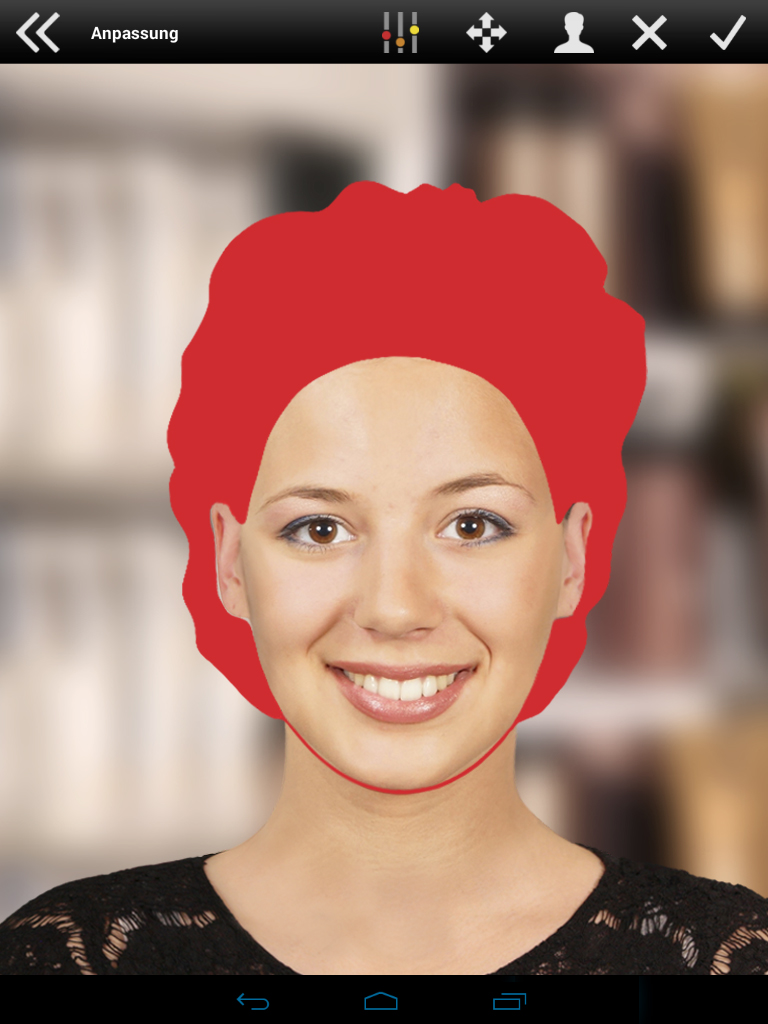
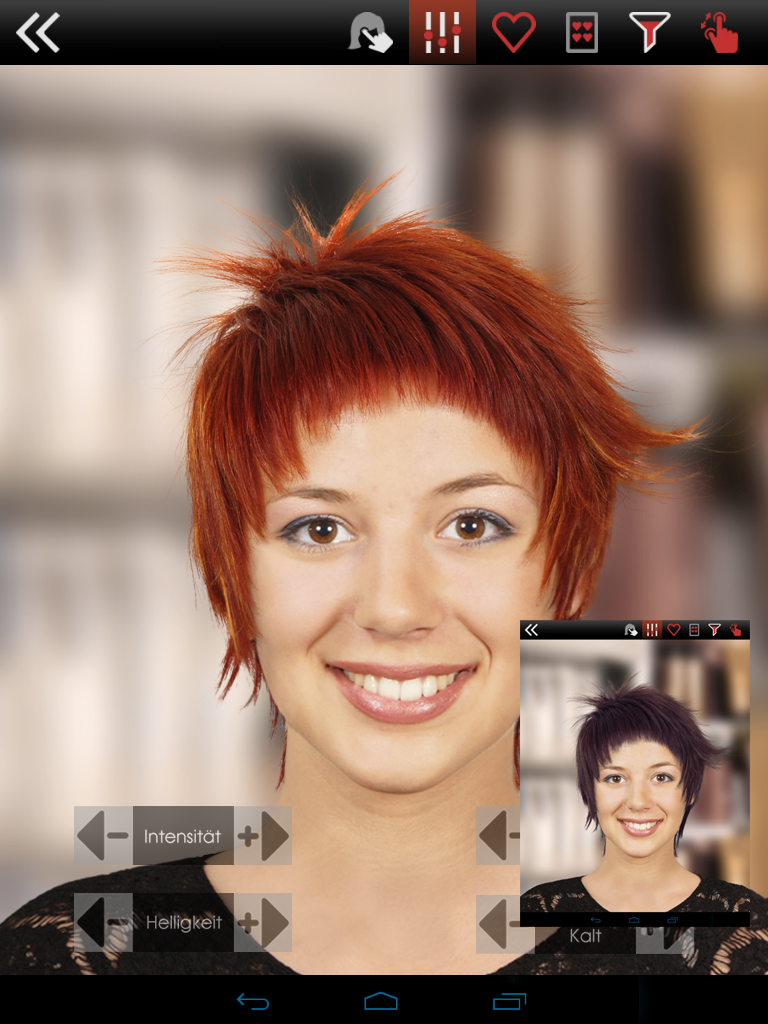
Adjustment
-

You can freely move and sqeeze the red sample hairstyle to fit it to the customer's face. This adjustment effects all hairstyles later on.
-

Switch to male mode
-

Switch to female mode
-

Cancel adjustment screen.
-

Accept the current position and size
-

You can also adjust the color of the captured image. This is helpful for instance in case of very cold room light.
-

By clicking the arrow symbols, the width and height of the sample hairstyles can be changed. R resets all changes made.
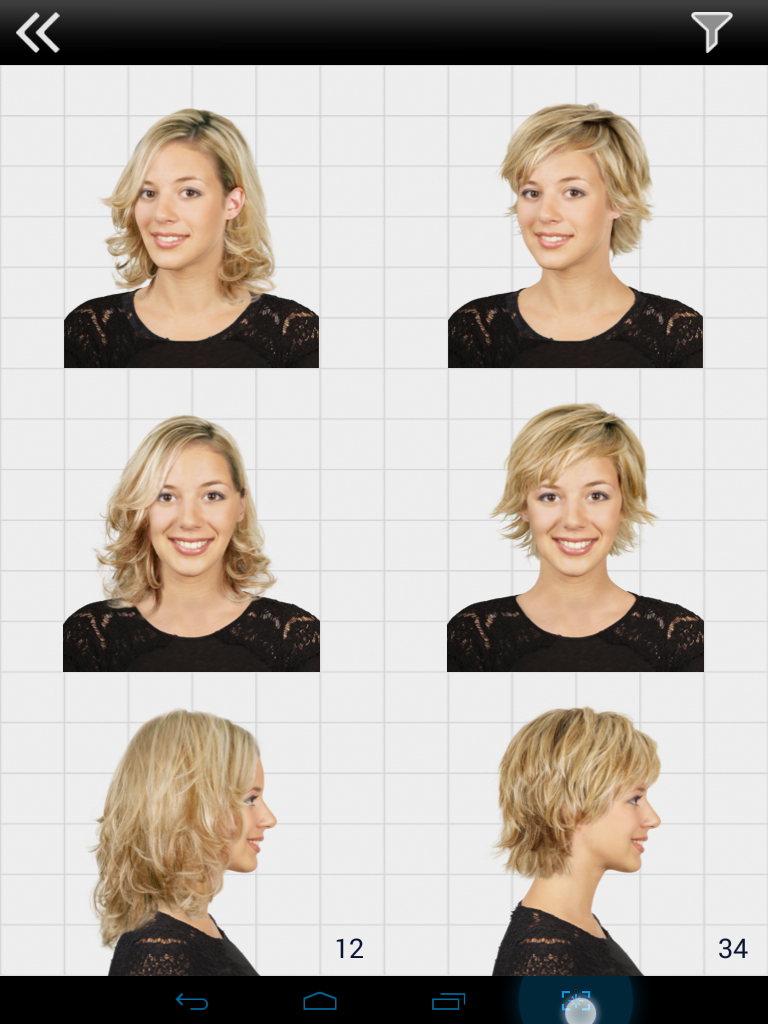
Atlas Mode
After image capture and adjustment you enter the atlas mode. Here you see the image of your customer shown in an overview. In the beginning only the image taken from front is shown.
Three perspectives: The possibility to capture and show your customer in three perspectives (front, half-profile, and profile) is new.
By clicking one of the six small images you get to the single view of that hairstyle in the corresponding perspective - provided the necessary image has already been captured.
If you have not captured an image for this perspective already, a short click will not have an effect.
With a longer click (keep pressed for two seconds) you can initiate the image capture for an additional perspective, or also delete a perspective.
-
Back to the main overview screen
-

Opens the filter screen.
Additional Perspective:
In this example the image for the half profile perspective is being captured.
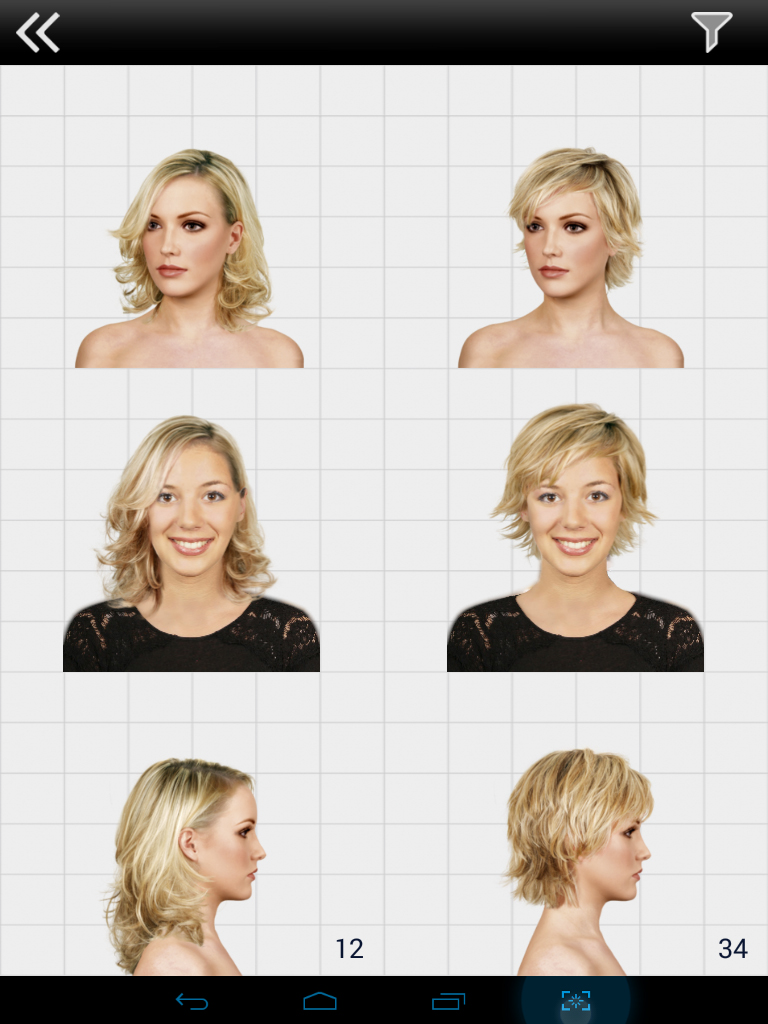
Using All Three Perspectives
Here you see the result if all three images have been captured.
By clicking one of the six small images you get to the single view of that hairstyle in the corresponding perspective.
By long-clicking (keep pressed for two seconds) you can delete an image again.
Single detail view
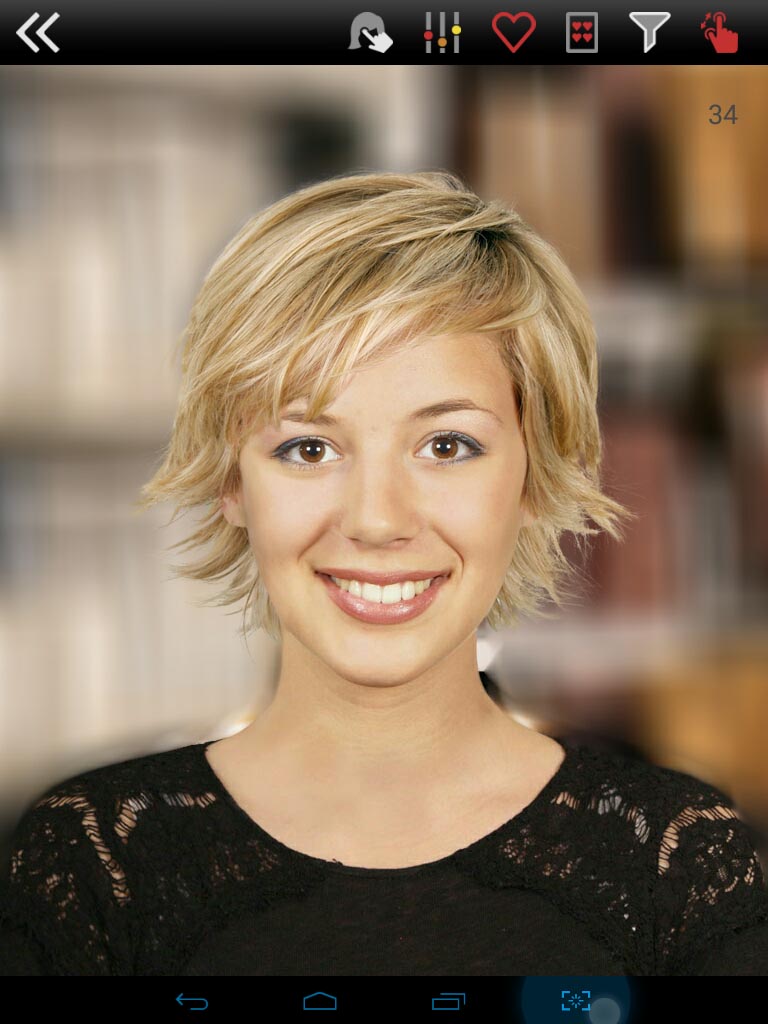
-
Back to atlas mode
-

Deform the hairstlye
-
Change colors of hairstyle
-

Add this style to favorites
-

Opens the favorites view
-
Show hairstlyle filters
-

Open adjustment view
Deforming
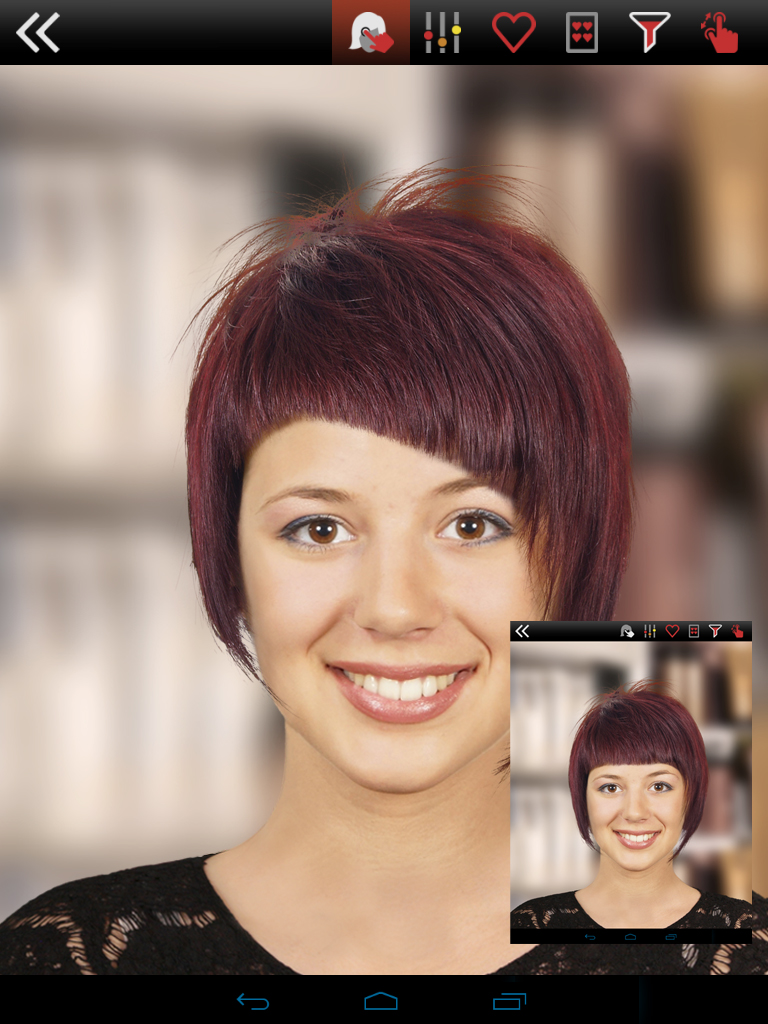
-
Click this icon to enter deforming mode. While in this mode, the swipe gesture to switch to another hairstyle is deactivated. To deform the hairstyle just move it with your pressed finger. As long as you are in deform mode, you cannot switch to another hairstyle.
-

By clicking the Reset button, all deformations are undone.
-

Exits deform mode. Now, swithcing the hairstyle is possible again.
Colorizations
-
Enters colorization mode. Tap the plus and minus buttons to change the settings.
-

Undo all changes.
-

Exit this mode.
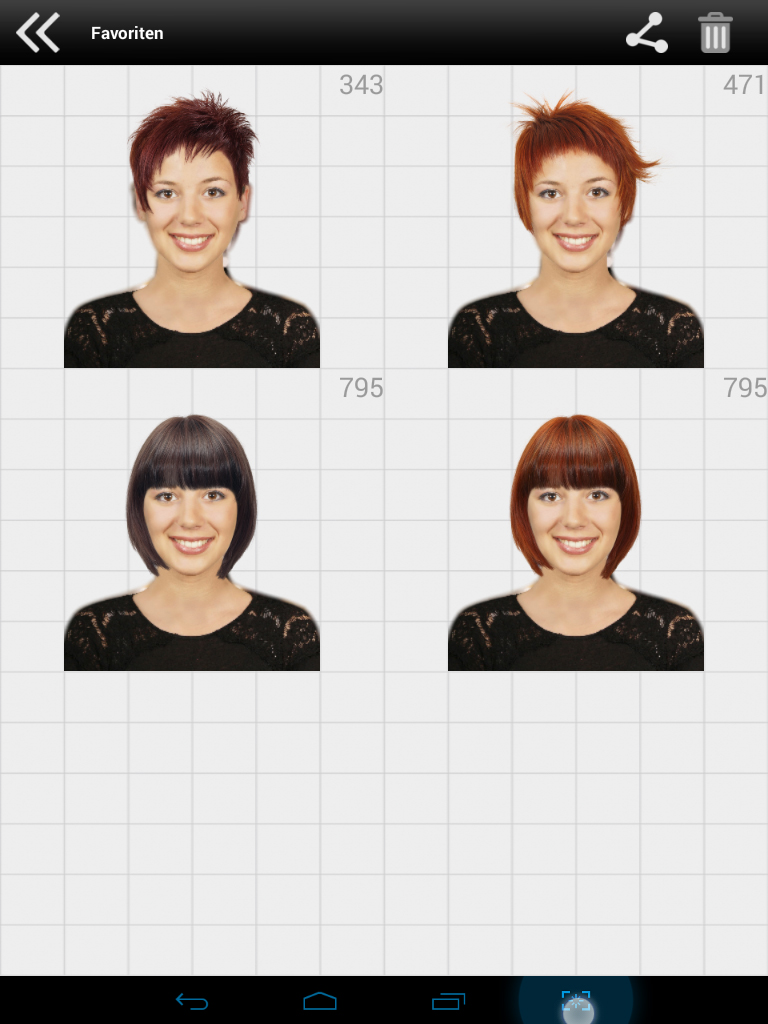
Favorites
-

Clear all favorites
-

Send all favorites, e.g. per mail.
-

By clicking a favorite image you get back to the detail view of it. To delete one favorite, long-click it and confirm the deletion.
Selections

-

Select blond hairstlyes
-

Select red hairstlyes
-

Select brunette hairstyles
-

Select black hairstyles
-

Select short hairstyles
-

Select medium long hairstyles
-

Select long hairstyles
-

Select up-dos
Settings Dialog
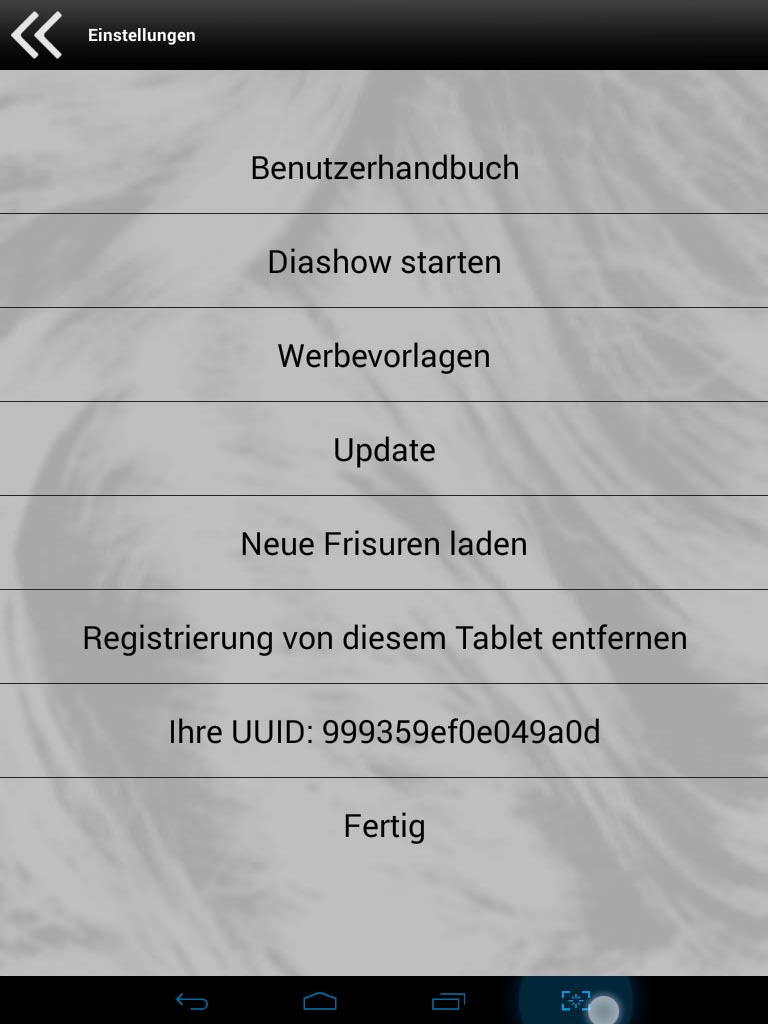
- User manual
- Opens this document
- Start slide show
- Opens the image gallery of the device. Choose the folder HairConceptSlideShow and click the menu item slide show on the top right border of the screen.
- Advertisement templates
- Download templates and ideas for advertisements, posters, etc.
- Update
- Update Hair Concept to the newest version via the Internet. Attention: any existing customer projects will be deleted during this process.
- Install new hairstyles.
- With this feature, you can install new hairstyle packages via internet.
- Unbind registration from this tablet.
- Your Hair Concept license is registered to your tablet. If you want to change your tablet, you can deregister your license with this feature. Of course, Hair Concept will not be usable on this tablet after the deregistration is complete.
- Your UUID
- This line shows the unique ID assigned to your tablet by the manufacturer. When contacting customer support, you will be asked this number.